Okra (Ladyfingers) Farming Guide in Kenya
With a maturity period of up to 60 days, and a ready local and export market, Okra Farming is an option the vegetable farmer can look into.
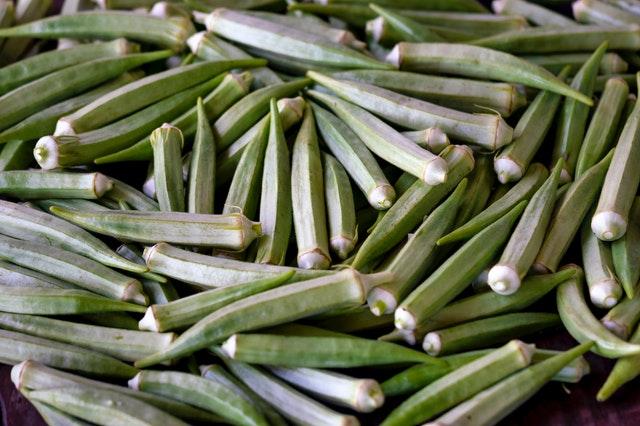
Long and curved, Okra is also known as ladyfingers in many English-speaking countries. In India, it is called bhindi and is touted as the magical enabler when it comes to prowess in mathematics. “2 ladyfingers a day keeps the back pain away” is a common belief in some areas.
If you are planting Okra in Kenya for export, it is advisable to do it in July, since the main export season is between October and May.
Health Benefits of Okra
Okra is mainly used as a vegetable in cooking. It has a slimy texture and a viscous juice that you can use to thicken your sauces. Okra also has nutritious benefits. It can lower your blood sugar levels and act as an antioxidant.
Consuming Okra reduces your risk of getting cancer. It lowers your blood sugar levels and helps reduce the risk of heart disease.
Varieties of Okra
Okra varieties available in Kenya are:
- Clemson spineless- This variety is 1.2 to 1.5 m tall. It has pods about 15 cm long, moderately ridged and green in color.
- White velvet- It is a medium-tall variety that grows 1.5 to 1.8 m high. Pods exhibit a smooth texture, with a creamy white appearance. The pods are about 15 to 18 cm long.
- Pusa sawani- It is a high yielding variety. It has long pods of about 18 to 20 cm. It also has smooth textured pods that are dark green in color. This variety grows 2 to 2.5 m tall. It is mainly targeted for the export market.
- Dwarf Green long pods- This variety can grow up to 0.09 m high. It has green pods that are angular. The pods are about 18 to 20 m long.
Ecological Requirements for Okra
Okra grows in hot temperatures at least 19°C. It does well in a PH ranging between 6 to 8. You should maintain an optimum temperature of 24°C – 30°C. Kenya’s well-drained fertile soils provide the best conditions for growing this vegetable.
Okra Yield per acre
In Kenya, a tree can yield 20 – 30 kg of fruit annually. If the spacing between your plants is 60 by 30 cm, you can get the highest yield of 12.86 t/ha. Planting high yielding varieties is recommended.
Land preparation for planting Okra
You need to prepare the soil 2 months before planting. This ensures that organic matter and crop residuals decompose before you plant your Okra. It also gives you enough time to destroy young weeds before planting.
Nursery preparation for planting Okra
In Kenya, Okra is directly sown in the field. You can grow your seedlings in plastic trays or nursery seedbeds. If you may want to speed up the germination of your Okra seeds, you can soak the seeds in water overnight before planting.
Transplanting Okra
In some parts of Kenya, Okra is planted 50 by 30 cm between the rows and within the rows. Spacing varies mainly for irrigation purposes. One hectare can accommodate about 10 kg of seeds. Planting holes should be about 1.5 cm deep.
Irrigation Requirements for Okra
According to the Kenya Ministry of Agriculture, your Okra plantation requires 400 mm of water during the first three months of growing. Okra is mainly grown in the semi-arid areas of Kenya. You are advised to provide 35 litres of water per square metre of your plantation. You need to irrigate frequently from the period of flowering to pod production.
Diseases affecting Okra
- Fusarium wilt- This is a fungal disease that is soil-borne. You will notice stunted growth. Leaves of your Okra plant turn yellow, wilt and may eventually shed off. High nitrogen content, acidic growth, water stress, and warm soil temperature
Pests affecting Okra
Your Okra plantation may be attacked by pests such as Thrips, Spider mites, Root-knot nematodes, Aphids, Spiny bollworm, Flea beetles and Cutworms.
- Thrips- They attack the lower surface of leaves. Environmental stress that weakens your plants makes them more susceptible to thrips attack. Both adults and larvae of this insect feed on the leaves.
You will notice curls and wrinkles which may eventually dry up. Thrips also feed on flowers. This may result in deformed pods. Use insecticides up to the early flowering stage.
- Spider mites- Mites may be visible as webs or tiny moving dots. They mainly attack the lower surface of the leaves. Water stressed plants are more susceptible to this attack.
You will notice the leaves turning yellow and may eventually drop from the plant.
- Root-knot nematodes- The nematodes are soil inhabitants. They mostly infest fields with sandy soil. Attacked plants turn yellow and have stunted growth. You may notice small lumps on the roots of your plant. The lumps are known as galls or root-knots.
You are advised to use resistant varieties to avoid this pest. When growing Okra in fields infested by nematodes, you need to intercrop with different mustards. This helps in bio-fumigation.
- Aphids- The cotton aphid has been identified as a major pest problem of Okra in Kenya. They are soft-bodied insects that hide under the leaves or stem of your Okra plant. Aphids are yellow or green in color. They excrete honeydew that encourages the growth of sooty mold on the plants.
You can manage aphids by pruning the affected leaves or shoots. You are also advised to use tolerance variety to manage the pest.
- Spiny bollworm- It is one of the major pests of Okra. The larvae usually attack terminal shoots of young plants. The larvae later move to the flower buds after pod production. You will possibly have yield reduction when they infest your crop. You are advised to limit the doses of nitrogen fertilizers. High doses increase the infestation of spiny bollworm.
To manage this pest, you need to check your crops regularly. Early detection helps to effectively eradicate the larvae. You should also destroy old crops and crop debris after harvest.
Weed Control
Effective timing for the cultivation of your land is necessary. You should practice shallow cultivation between crops and rows to control weeds. If you cultivate too late, the weeds may be too large and therefore hard to eradicate.
Intercropping
You can intercrop Okra with cowpea or groundnut. You should ensure sufficient spacing of 60 m by 30 m between rows. Intercropping gives you a monetary advantage. In many parts of Kenya, Okra has been used in cropping mixture with legumes.
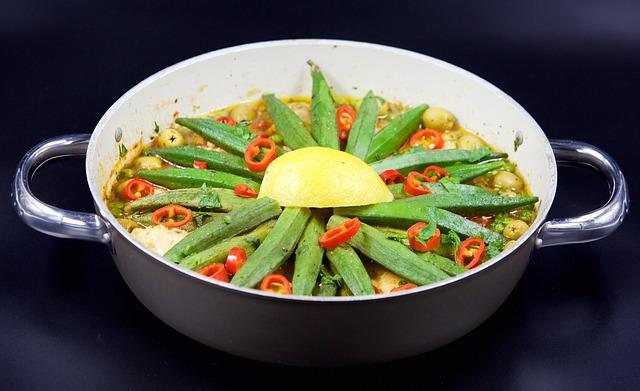
Harvest and Post-Harvest
Your crop grown in Kenya is ready for harvest 45 to 55 days after planting. The flowering of your pod gives you an indication that your Okra has matured. Harvest the pods 4 to 6 days after flowering.
The time of harvest depends on variety and market requirements. If the target for your Okra is the market, you need to pick regularly every 1 to 2 days. This ensures that your pods meet the conditions of the Kenyan market.
When harvesting, it is recommended to snap or cut off the pods by hand. You should leave a stalk not longer than 1 cm. You are advised to wear rubber gloves when harvesting and handling your crops. This protects your skin from irritation caused by sap produced by your okra plant.
The best time for harvesting is early in the morning before the sun becomes hot. This is because Okra dehydrates very fast, after harvest, causing deterioration in quality. If growing Okra for the export market, it is good to cool them immediately after harvesting so as to maintain the moisture and quality.

I have farm in Laikipia…
I have farm in Laikipia county,can okra grow there…
I’m based in Kilifi, and now…
I’m based in Kilifi, and now sowing it in an acre piece of land. Where can I get a ready market in the next one month?
Gerald
Am at coast and I have one…
Am at coast and I have one acre of ocra I beg to get market from you.
I wuold like to get into…
I wuold like to get into this farming. this information is very important for me.
Where exactly is okra grown…
Where exactly is okra grown in Kenya, am interested .